

Since it is the first "Shop-day," I thought of teaching you how to make a simple wallpaper. This is mostly aimed at people who don't really know how to do much, so if you know the basics, then you might not be so interested on it. Next Tuesday, I am thinking of teaching you about "Color Swapping" or where you change the color of a person's eyes, a car, or almost anything.
[NOTE: If you think I should improve on something, explain further, or anything about Photoshop Tuesdays please leave your thoughts on a comment, or if you wanna remain anonymous, email me at super3011@gmail.com and I will try to answer those questions or answers in the next post.]
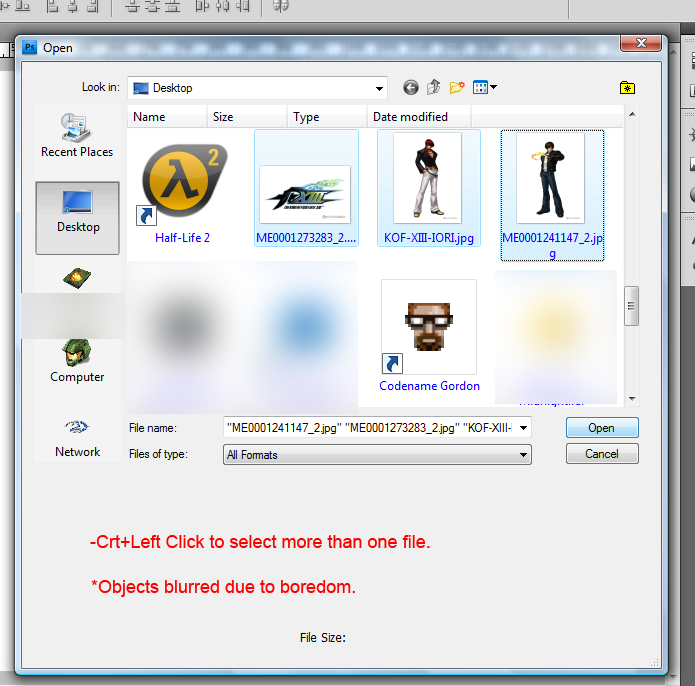
For this project, we are gonna used 3 renders. I chose 3 from The King of Fighters XIII because it brings awesome memories, but I recommend using your own, because you are doing a wallpaper to your likings.


Right after, click open, but leave the wallpaper page open, we will need it later on.

Choose your renders, and click open.
When you open your render, some of the time it will open like this. If it contains a white background, we have to erase it because we cant work with it, unless your wallpaper background color will be white.

Right Click the eraser icon on the "Tools" toolbar, and then chose "Magic Eraser Tool"

After that, click on the white background of the picture, and "Ta Dah!" the white gets replaced by gray boxes.

Also, if your render contains any kind of writing, and you don't want it, just chose the normal eraser, and erase it.

When all of your renders have no background, we drag their window, and we select the wallpaper, then we select the arrow icon on the toolbar, and then we drag the render from its window to the wallpapers by dropping it anywhere on the wallpaper's window

Now, you should have all of your renders on your wallpaper window.

Make a new layer by clicking the layer button on the bottom right of the Photoshop Window.

Now we need a background for the wallpaper instead of a boring white. So right click on the bucket icon on Photoshop and chose Gradient.

Now click the box with the gradient located on top, near the "file" "edit" and so on.

Here, you are presented with a bunch of stuff. You can pick one of the already made gradients so that you don't waste time, or create your own. I wanted mine to be special so I clicked the small box of color, and then the second box so i could select a new color.

When you click the Second Color Box, you get a new menu on which you can select a new color, so chose one, click OK, then click the other box and do the same, when you get the two colors that you want, click OK on the original menu.

On the Top toolbar, or "brush option" menu, you can chose if you want it to show it as a circle, lines, or diamonds, so chose one, then click anywhere on the background and drag to any direction.

After all that, what exactly did we do? This. Please leave comments with links to your results, or questions, or doubts, or whatever. I hope you guys had fun, and am sorry if the loading of the images just killed you. :( I had no better idea of how to show you my ways, any recommendations welcomed.
Nice, I love PhotoShop!
ReplyDeletewow, really good, im new to photoshop and thats a tutorial thats exactly what i searched for!
ReplyDeleteNice post mate
ReplyDeletesupporting
http://cktrandomdelights.blogspot.com/